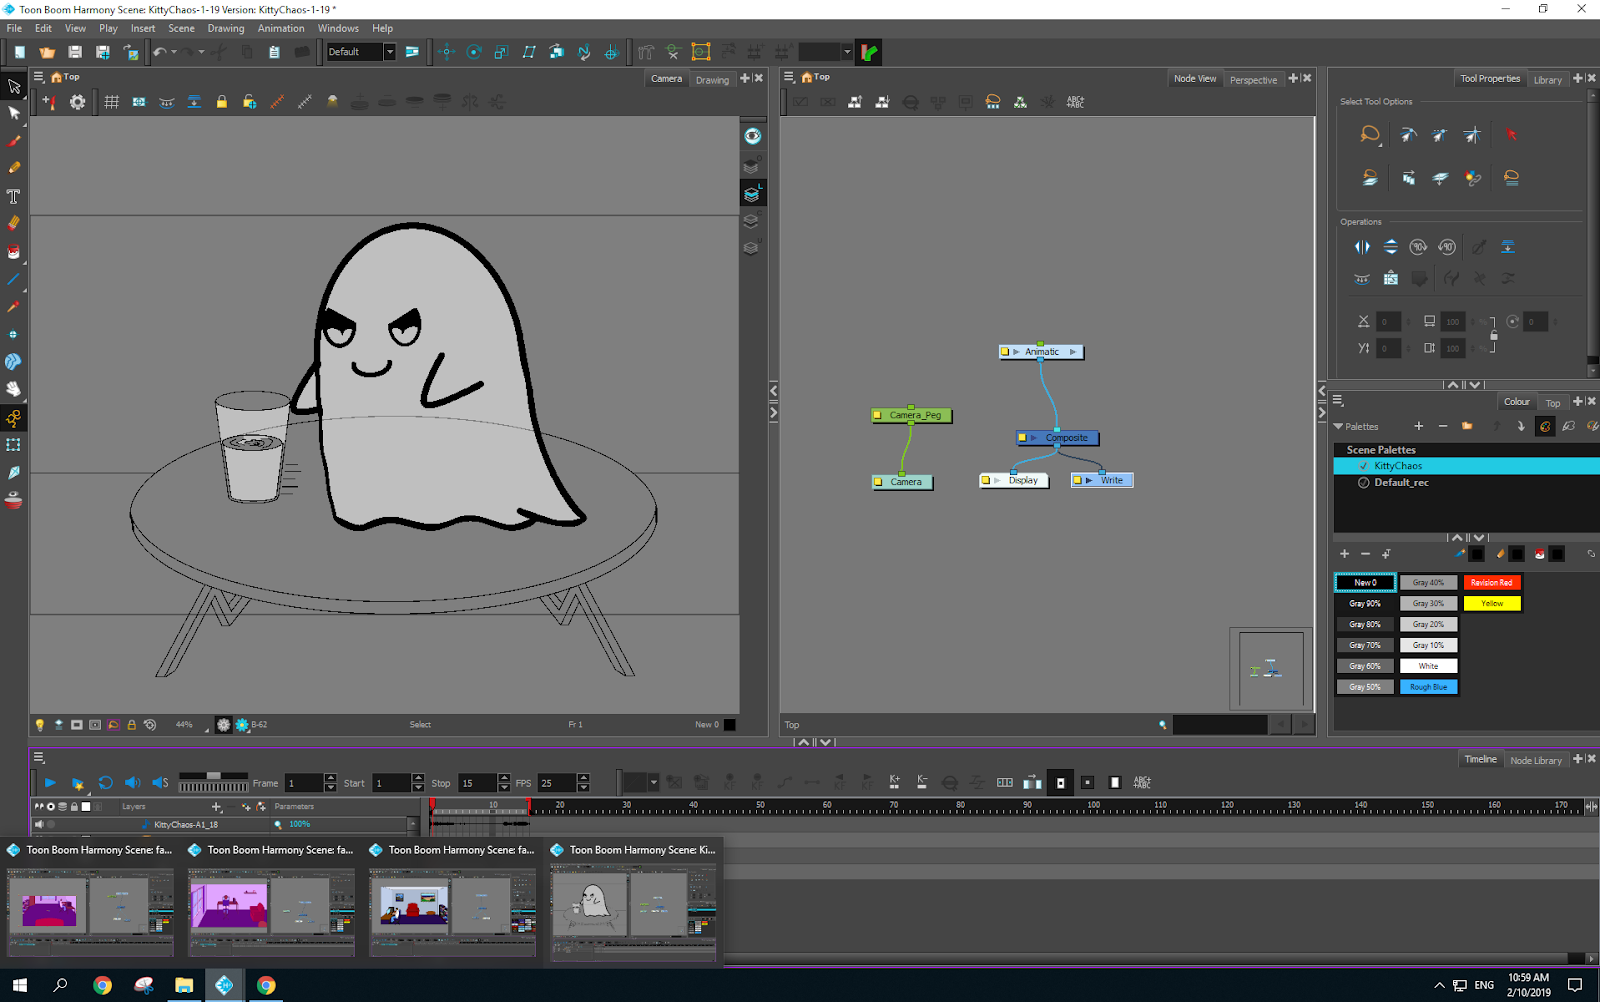
Ghosties rig is done now too except for changing the bottom half of her body when she moves sideways.
Showing posts with label #BSA 127. Show all posts
Showing posts with label #BSA 127. Show all posts
Monday, 21 October 2019
2D Animation 21/10
2 weeks til due date. Yikes. Rig is done, although there is going to be some cleanup in the animation as I cant quite get the leg shapes 100% right for the movement. I have also adjusted the blink cycle length to allow for the pause in between.
Ghosties rig is done now too except for changing the bottom half of her body when she moves sideways.
Ghosties rig is done now too except for changing the bottom half of her body when she moves sideways.
Wednesday, 16 October 2019
2D Animation 16/10
Eye blink cycle done. Getting the leg shapes right and the pivot points set in the right place is actually a lot harder than anticipated. Thankfully after tomorrow there isnt anymore assessments until the 1st nov so I wont be as distracted.
Monday, 14 October 2019
2D Animation 14/10
To-Do list for weds
check colours match up with linework
eye blink cycle, eye drawing substitutions.
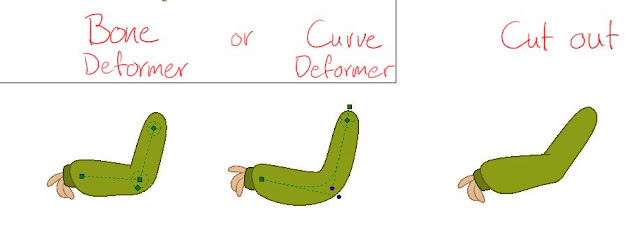
deformers - curve for tail, bone for forearm
reset pivot points to where they should be
add whiskers

auto patch node connects to main composite in the correct layer order.
check colours match up with linework
eye blink cycle, eye drawing substitutions.
deformers - curve for tail, bone for forearm
reset pivot points to where they should be
add whiskers

auto patch node connects to main composite in the correct layer order.
Wednesday, 9 October 2019
2D Animation 9/10
Highlight and Shading - must be done after all the animation cycles are complete and in Render view!!
Two node options:
Create a shading layer and connect it to a Tone node then paint on the shaded area. Same with highlight.

Add Apply Peg Transformation node and connect it to a highlight/shade node. Create a new peg and attach it to the Peg transform then use the transform tool to drag the mask around to show the shadow/highlight.

Shadow - Must be done after all animation and in render view also!!
Create a new Peg transformation node and connect it to the rig and the main composite

To fix the shadow layers, add a bitmap composite and insert it between the peg node and the rig.

To warp the shadow to fit the perspective of the background, add a mesh warp node. Go to View and Show Controls to manipulate the warp peg.

Use the Transform tool to line the mesh up with the shadow

then switch to the translate tool to manipulate the shadow.

Finish completing simbas segments, mouth and eye substitutions
Monday, 7 October 2019
2D Animation 7/10
Backgrounds are all in, however now I realise I need to modify one for the last few shots due to the bookshelf falling over whoops!. At least it is an easy fix. I am looking forward to getting Simba running around in my animation finally, add a bit of life to it. I also think I need to add a little idle to the human in the full background shots that are visible for longer than a split second.
Look into ease in/ease out parameters to smooth the credits screen movement.
Look into ease in/ease out parameters to smooth the credits screen movement.
Wednesday, 2 October 2019
2D Animation 2/10
I regret having 36 shots! Most definitely thankful that my backgrounds were done in Toon Boom so I can literally just drag the layer over and keep it editable for each shot. This is still very tedious and time consuming though! I am putting the computer under a stress test having 3 different toon booms open while opening and closing a 4th for each shot. If it explodes, you know why....

On a real note though, the last two weeks have been 98% coding workshop, so I definitely have a bit of catch up to do. 26 shot backgrounds done, 10 to go..
On a real note though, the last two weeks have been 98% coding workshop, so I definitely have a bit of catch up to do. 26 shot backgrounds done, 10 to go..
Monday, 16 September 2019
2D Animation 16/9

Finally got the rigging done for Simba. Next is walk/run cycles since i need them for gaming as well. Had to take a breather for 5min cos I was getting frustrated with the deformer tool, turns out Im just an idiot and wasnt hitting the right button to complete the deformer creation.
Thursday, 5 September 2019
2D Animation 4/9
Working on Simbas rig now, the sooner I get it finished, the sooner I can use it for my gaming animation loops as well as my actual animation. After somehow screwing up the save as new version somehow, I had to use a backup version and separate out the original files into individual projects due to some weird crossover making parts get modified in both versions at once. Thankfully it was only a small amount of work that broke, and easily remade.
Monday, 2 September 2019
2D Animation 2/9

If I want to use this to make Ghostie blink, I need to redesign her eye a bit as her iris/highlights dont really work with this method. At this stage just playing around so I learn how to do it, although I need to get part of this working for when the two characters narrow their eyes at each other.

Wednesday, 28 August 2019
2D Animation 28/8


Note to Self - drag the rig template onto the drawing box, not the node box to auto create layers. If i forget, i can connect the nodes to the master composite to create the drawing layers.
Monday, 26 August 2019
2D Animation 26/8
Rigging

Create a new composite for each part of the hierarchy.

Make the composite pass through for each section.

Use ctrl + shift + p when nodes are selected to create a peg on each node. ctrl + p will create a single, grouped peg for the selected nodes.

When adding new components, make sure to parent them in the correct place ie cuffhand above cuff and hand but still below lower arm.

Add a colour coded backdrop for organisation. You can hit the yellow box to add important notes to the group.

Select keyframes, hold ctrl and drag to copy them to a new frame.
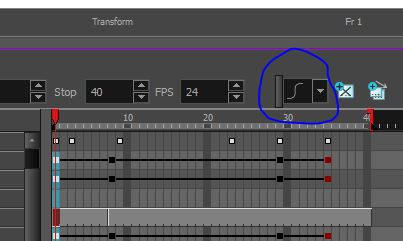
Use the ease in and ease out to smooth the motion.


 Similar steps as before, create a new pass-through composite, connect the layers and ctrl + shift + p to get the pegs except re-center pivots before parenting the two nodes this time.

Select the drawing layer, click the rigging tool, make sure its on auto then click the point where u want "joints" and hit the transform tool to finalise.

This time once the drawing layer is selected, choose the curve deformer. To create the "joints" click and drag to make the movement handles, from top to middle, and bottom to middle. Hit transform to finalise then adjust the handles as you see fit to deform. This method is a lot bendier "rubber hose" style.

Create a new composite for each part of the hierarchy.

Make the composite pass through for each section.

Use ctrl + shift + p when nodes are selected to create a peg on each node. ctrl + p will create a single, grouped peg for the selected nodes.

When adding new components, make sure to parent them in the correct place ie cuffhand above cuff and hand but still below lower arm.

Add a colour coded backdrop for organisation. You can hit the yellow box to add important notes to the group.

Select keyframes, hold ctrl and drag to copy them to a new frame.
Use the ease in and ease out to smooth the motion.
Deformers

Two types of deformers, with the deformation chain showing


Select the drawing layer, click the rigging tool, make sure its on auto then click the point where u want "joints" and hit the transform tool to finalise.

This time once the drawing layer is selected, choose the curve deformer. To create the "joints" click and drag to make the movement handles, from top to middle, and bottom to middle. Hit transform to finalise then adjust the handles as you see fit to deform. This method is a lot bendier "rubber hose" style.
Wednesday, 21 August 2019
2D Animation 21/8

Simple 2D rigging with nodes shown.

Way more complicated, this rig has 360 views included.
When a node is selected, hit o to center on the right layer in the timeline instead of having to search for it.
Homework is going thru my shots and getting the backgrounds in, and camera animations transferred over to the new layers.
Monday, 19 August 2019
2D animation 31/7
Spent the class being distracted by noisy classmates and didnt really achieve anything. Really not great timing considering the lack of time left til the pitch bible is due.
2D Animation 19/8


Use the premiere pro export as a base layer to place the finished animations over top.


Alternate views.

Left is camera view, middle is node view, bottom right is perspective view. ctrl + alt to rotate the camera in the perspective panel. Use the top view, select the layer and then move it forward or backward depending on whether its a foreground or background layer. Perspective view is what you use to see the layers are they are currently sitting in a visual format. When grouping in node view, use ctrl + shift + g to create a clean, single line group as shift + g keeps all the individual node lines. Copy the group to the library to import the background into your project.
Wednesday, 14 August 2019


2D Animation 14/8
Finished backgrounds for all intents and purposes. There is some shading and tweaks to the backgrounds that I want to add but that will depend on how much time I have left. The main thing I need to work on is changing the end sound track to match the new panels that I added.


Subscribe to:
Comments (Atom)
BSA702 14/7
arrays and lists Quick and Easy Galaxy painting great tutorial I found when I was looking for a background for my pitch tomorrow. I want t...

-
Character/Game idea colour dropper - player has a set amount of time to pick a colour to stand on, all other colours drop out causing player...
-
2019.1.8f1 unity version - update home install to match. Look into the software bundles I got from humble and see if they are useable for cl...
-
 Preliminary game-flow chart Make a title Colour Party Who is the game for Ages 6 and up What is the game play style 3D, Round based colour m...