
Create a new composite for each part of the hierarchy.

Make the composite pass through for each section.

Use ctrl + shift + p when nodes are selected to create a peg on each node. ctrl + p will create a single, grouped peg for the selected nodes.

When adding new components, make sure to parent them in the correct place ie cuffhand above cuff and hand but still below lower arm.

Add a colour coded backdrop for organisation. You can hit the yellow box to add important notes to the group.

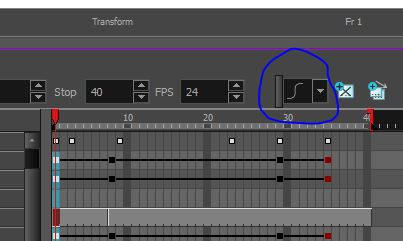
Select keyframes, hold ctrl and drag to copy them to a new frame.
Use the ease in and ease out to smooth the motion.
Deformers

Two types of deformers, with the deformation chain showing


Select the drawing layer, click the rigging tool, make sure its on auto then click the point where u want "joints" and hit the transform tool to finalise.

This time once the drawing layer is selected, choose the curve deformer. To create the "joints" click and drag to make the movement handles, from top to middle, and bottom to middle. Hit transform to finalise then adjust the handles as you see fit to deform. This method is a lot bendier "rubber hose" style.


No comments:
Post a Comment